
When it comes to creating a cozy and warm atmosphere in your home, installing a wood burning stove can be a great option. Not only does it provide an alternative heating source, but it also adds a rustic charm to any room. Installing a wood burning stove requires careful planning and execution to ensure both safety and efficiency. In this comprehensive guide, you will learn everything you need to know about installing a wood burning stove, from planning and preparation to the final testing and safety precautions. So, let's dive in!
Planning for Installation
Before you start installing a wood burning stove, it's crucial to have a solid plan in place. Here are some steps to consider during the planning phase:
- Local Regulations: Check with your local building department or fire officials to understand the regulations and permits required for installing a wood burning stove in your area.
- Size of the Stove: Determine the size of the stove you need based on the square footage of the room you want to heat.
- Budget: Set a budget for the entire installation process, including the cost of the stove, chimney, and any additional materials or labor.
- Safety Precautions: Familiarize yourself with the safety guidelines for wood burning stoves to ensure a safe installation process.
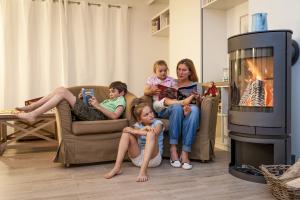
Choosing the Right Location
Selecting the right location for your wood burning stove is crucial for its efficiency and safety. Here are some factors to consider when choosing a location:
- Clearance: Ensure that there is enough clearance around the stove as per the manufacturer's instructions to prevent any fire hazards.
- Ventilation: Choose a location near an exterior wall to make it easier to install the chimney and ensure proper ventilation.
- Accessibility: Select a location that allows for easy access to the stove for loading wood and cleaning.
- Heat Distribution: Consider how the heat will be distributed throughout the room and choose a location that maximizes heating efficiency.
Measuring and Preparing the Space
Once you have chosen the location for your wood burning stove, it's time to measure and prepare the space for installation. Follow these steps:
- Measurements: Measure the dimensions of the space where the stove will be placed to ensure a proper fit.
- Floor Protection: Install a non-combustible floor protector under the wood burning stove to prevent heat damage to the floor.
- Clearing the Area: Remove any furniture, carpets, or other flammable materials from the vicinity of the stove to reduce the risk of fire.
- Preparing the Chimney Route: Determine the best route for the chimney to ensure proper venting of the wood burning stove.
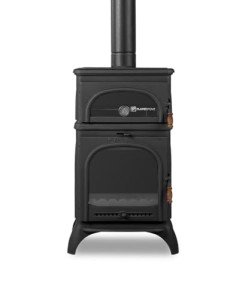
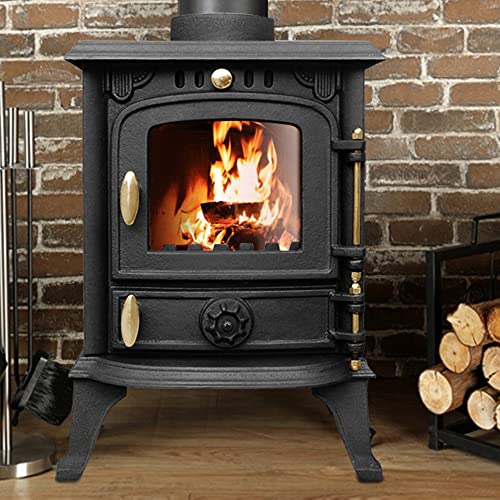
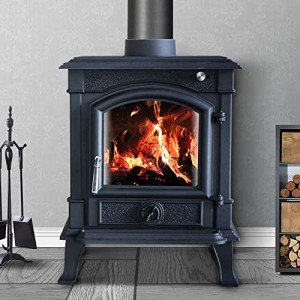
Selecting the Stove
Choosing the right wood burning stove is essential for both functionality and aesthetics. Consider the following factors when selecting a stove:
- Heating Capacity: Determine the heating capacity of the stove based on the size of the room you want to heat.
- Efficiency: Look for stoves that are EPA-certified for efficiency and low emissions to minimize environmental impact.
- Design: Select a stove that complements the style of your home and fits in with your decor.
- Material: Consider the material of the stove, such as cast iron or steel, based on your heating needs and preferences.
Installing the Stovepipe
The stovepipe is an essential component of a wood burning stove installation as it connects the stove to the chimney. Follow these steps to install the stovepipe:
- Gather Materials: You will need a stovepipe, elbow joints, screws, and a screwdriver for this step.
- Attach the Stovepipe: Attach the stovepipe to the flue collar on the wood burning stove using the elbow joints and screws.
- Positioning: Position the stovepipe vertically and ensure a secure connection to the stove to prevent any leaks.
- Sealing: Seal the joints of the stovepipe with high-temperature sealant to prevent any smoke leakage.
Connecting the Stovepipe to the Stove
Connecting the stovepipe to the wood burning stove is a critical step in the installation process. Here's how to do it:
- Positioning: Align the stovepipe with the flue collar on the stove and connect them securely using the appropriate fittings.
- Securing the Connection: Use screws to secure the connection between the stovepipe and the stove, ensuring a tight seal.
- Checking for Leaks: Once the connection is made, inspect it for any gaps or leaks and seal them with high-temperature sealant if necessary.
- Clearance: Ensure that there is enough clearance between the stovepipe and any combustible materials to prevent fire hazards.
Installing the Chimney
Installing a chimney is essential for venting the smoke and gases produced by the wood burning stove. Follow these steps to install the chimney:
- Choosing the Material: Select a chimney material that is suitable for your home, such as stainless steel or masonry.
- Assembly: Assemble the chimney components, including the chimney pipe, flashing, and cap, according to the manufacturer's instructions.
- Attaching the Chimney: Attach the chimney to the ceiling or roof, ensuring a secure connection to the stovepipe and proper ventilation.
- Sealing: Seal the joints of the chimney with high-temperature sealant to prevent any smoke leakage.
Insulating and Sealing
Proper insulation and sealing are crucial for the efficiency and safety of a wood burning stove. Follow these steps to insulate and seal the installation:
- Insulating the Chimney: Insulate the chimney to prevent heat loss and improve the draft for better combustion.
- Sealing Gaps: Seal any gaps or leaks around the stove, stovepipe, and chimney using high-temperature sealant to prevent smoke or gas leakage.
- Fireproof Materials: Use fireproof materials such as fire-resistant insulation and caulk to protect the surrounding area from heat damage.
- Ventilation: Ensure that there is proper ventilation around the wood burning stove to prevent overheating and improve air circulation.
Testing the Wood Burning Stove
After completing the installation process, it's essential to test the wood burning stove to ensure that it is functioning properly. Here's how to test the stove:
- Initial Fire: Start a small fire in the wood burning stove to test the ignition and combustion process.
- Observation: Observe the smoke and gases coming out of the chimney to ensure that the stove is venting properly.
- Temperature Check: Use a thermometer to check the temperature of the stove and chimney to ensure that they are within a safe range.
- Draft Test: Conduct a draft test to check the airflow and ventilation of the wood burning stove for efficient combustion.
Safety Precautions
When installing a wood burning stove, safety should be a top priority. Here are some safety precautions to keep in mind:
- Clearance: Maintain the recommended clearance between the stove, stovepipe, and chimney to prevent fire hazards.
- Regular Inspection: Inspect the stove, chimney, and surrounding area regularly for any signs of wear, damage, or leaks.
- Fire Extinguisher: Keep a fire extinguisher nearby in case of any emergencies or accidents.
- Carbon Monoxide Detector: Install a carbon monoxide detector in the room where the wood burning stove is located to monitor indoor air quality.
FAQs
1. Can I install a wood burning stove myself?
Yes, you can install a wood burning stove yourself, but it is recommended to consult with a professional to ensure proper installation and safety compliance.
2. What is the best location for installing a wood burning stove?
The best location for a wood burning stove is near an exterior wall for ventilation and accessibility, with enough clearance around the stove to prevent fire hazards.
3. How do I clean a wood burning stove?
To clean a wood burning stove, remove ashes regularly, clean the glass door with a suitable cleaner, and inspect the chimney for any creosote buildup.
4. How often should I have my chimney inspected?
It is recommended to have your chimney inspected and cleaned at least once a year to prevent chimney fires and ensure proper venting of the wood burning stove.
5. Can I use any type of wood in a wood burning stove?
It is best to use seasoned hardwoods such as oak, maple, or birch in a wood burning stove as they burn cleaner and produce less creosote buildup.
6. How do I troubleshoot a smoking wood burning stove?
If your wood burning stove is smoking, check for a dirty chimney, damp wood, or poor draft, and address any issues accordingly.
Installing a wood burning stove can be a rewarding experience that adds warmth and character to your home. By following the steps outlined in this guide and taking the necessary safety precautions, you can enjoy the comfort and ambiance of a wood burning stove for years to come. Remember to consult with professionals when needed and prioritize safety throughout the installation process. So, roll up your sleeves, gather your materials, and get ready to enjoy the cozy glow of a wood burning stove in your home!